Thursday, August 27, 2009

Bailey's Room...

This is kinda old, but I don't think I've posted it here on the blog. I've been MIA for so long and have little time to do much as I adjust to the kids being back in school, so it's at least something.

My daughter Bailey's room was fun to decorate. When we started the makeover it was to move out her sister so that she could have her own room. My budget was very tight yet I was able to accomplish this for about $300.


Bailey LOVES the color pink. But I can only handle so much of it. Therefore, I had to keep her away from the room as I started with the paint. The ceilings in here are 12 feet tall, so painting in its self was challenging. I went with a bright green through out the majority of the room and accented the entry way wall and the back wall with the bright pink. It almost looks red depending on the time of day.

The furniture is mostly all from my husband's grandmothers estate. She had passed away recently so I took a mis-matched bedroom group and painted it all white. The bed is an older style bed with spindles, so I painted the balls and spindles the same pink as the walls. The hardware was replaced with updated matte black pulls.


Because the colors are already all so bright I went with simple and plain white letters for her name and used mismatched black and white pattern ribbons. I don't like everything to match. So you will notice that the black and white patterns are all different. The bulletin board was made with a left over canvas and the remaining ribbons.


Bailey, REALLY wanted this circle pattern comforter set from Target. But it was a bit more pricey than I wanted to spend, but in the end I couldn't agree more with her choice. As you see the curtain is another black and white. The corner shelf unit was also from the estate and was in pretty bad shape and dated until I added the white and bright pink paint. The dresser was my sister's when she was a child and has been repainted a couple of times since my kid's have been around. I went with the ovals behind the hardware because regardless of how much I sanded down the wood I couldn't get the old hardware's indentions out.

So that's her room. I re-did all of the kid's rooms since then and hope to share those as well. Hopefully, you will have gotten some sort of ideas from this.

Tuesday, August 4, 2009

New Artwork

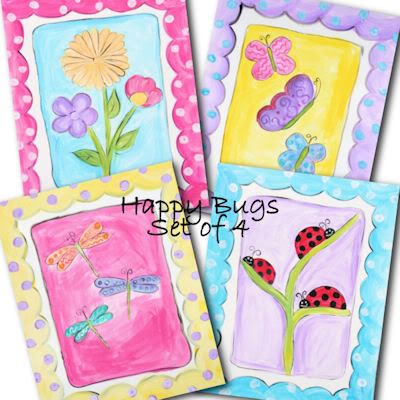
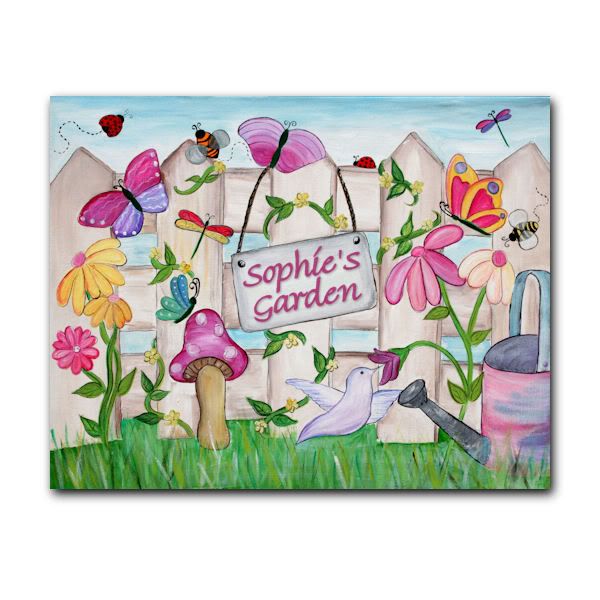
New artwork . They are listed on etsy and ebay but will be coming soon to TiddliwinkDesigns.com

This set, Hannah's Fairies, was created to cooridinate with the Pottery Barn Kids bedding set. I think these girls are adorable.

The nursery rythym set was created for my cousin and his wife who are expecting their first son next month. Humpty Dumpty and Hey Diddle Diddle are two of my favorite nursery rythyms!


This set was just for fun. I sketched it out a couple of months ago and forgot about it. It's bright and colorful and reminds me a lot of my earlier works, but I still like it a lot.

Thursday, July 30, 2009

A paint spot makeover

My little painting spot has moved several times over the years. It started at the kitchen table, moved to our very expensive dinning table, then was moved to the downstairs in various places. Eventually I landed in the dungeon. The unfinished area of our house, which is also the home of our water heater, furnace and electricity central. I did this in an effort to keep my clutter out of sight from my husband, who HATES clutter. But all artists know that painting in dark spaces is very inhibiting. Even after investing in 2 true light lamps I still had a difficult time. Within the last 6 months I moved my stuff behind our sofa in the family room, which is directly in between 2 french double doors with LOTS of natural lighting. I quickly discovered how much I LOVED painting here. I could see the kids, I could see the television, I could see my ART!

Except it was getting pretty cluttered and messy. Mostly because I was doing this all on an old poker table covered in cardboard. This week I worked on cleaning up the clutter and created a nook I can now retreat to and feel relaxed!

Here is the outcome:


My dad helped me to make this really awesome ribbon holder. I HATE dowels going through my ribbon because if I want to organize by color and I add new ribbon then I have to take ALL of the other ribbon spools off and start from scratch. This holder has a lip on the edge of each shelf to prevent my ribbon from rolling off. I spray painted it black, and then stapled black poster board to the back. Lovin' it, right?? Dad's are awesome.

I moved my peg board from the dungeon to below the ribbon holder. So much more efficient.

This set of canvases I made out of scrap paper I had on hand, mod podge and paint. I love it!

I bought the black desk and book shelf and lined the back side of the desk with fabric and paint so that the unfinished edges wouldn't show. The storage furniture in the back I got on clearance, and is actually closet organization furniture. The shelves actually slide out. I like that a lot.

Of course, most of my stuff is still in the dungeon but that's okay. It's stored away neatly in the area that has no light. But I will now have all of the light I need, and it looks good enough not to have to hide.


I do try my best to label everything. Although I mostly paint I have everything from foam crafts to embossing guns stored here.


This is where I keep most of my shipping supplies and canvases.

I used to put up images of my artwork on this back wall for inspiration, but I've been so busy that I stopped doing that a couple of years ago.

Tuesday, July 28, 2009

Old and new art...

I found this picture of the kid's toy room when I first painted a mural in there. My sister did the cute little girls on the swings and the baby crawling in the grass. That was painted over for an underwater theme and then painted over again, but without a mural.


I've made a couple or three new designs. They will be listed at TiddliwinkDesigns.com soon. In the mean time they are on etsy and ebay. I've been swamped to say the least. In addition I'm working on my working area. I can't wait to post pictures of that stuff. Exciting.


Here are the new designs:


Friday, July 24, 2009

And when you plan a wedding...

don't forget to make your entrance unforgetable!


I really loved this on many levels. But could you imagine being asked to be a bridesmaid and then told, "oh, yea, I am going to need you to dance your way down the aisle"?

But I still shed a tiny tear when the bride emerged. Not only did she get the crowd to stand but they applauded as well! What fun years this couple will likely have ahead of them.

Louisville Theatre Review...

"The most glorious visual element of all occurs at the end, however. Without giving it away, I'll say that artist Keshia Tatum Smith has created something breathtaking that underscores The Secret Garden's message that with love and attention, regeneration is possible even after the darkest of times."

I am so proud!

You can see the rest of the review here.

Monday, July 20, 2009

And it's complete...

I have finished the mural for "The Secret Garden." Darby and I went to see the show this past weekend and it was fabulous. The entire show as a whole. I was very pleased with the production skills of the Shelby County Community Theater. The cast was amazing and extrememly talented. If you are a local, you should definitly take the time to see.

Here are the pictures.


Now I can get back to my regular schedule. I have several custom orders to get working on and a LOAD of ideas floating in my brain. Just need the time to get working.

Tuesday, July 7, 2009

The Secret Garden is blooming

Here are some more progress pictures for The Secret Garden. I will get started on the muslin tomorrow, which measures about 1/3 of the original wall.


Thursday, July 2, 2009

Summer Time and The Secret Garden

Summer Time means that I am responsible for 4 kiddos who are out of school, therefore I am totally slacking in the blog department. My current task is completing the mural for the set of The Secret Garden which is set to open July 17th at the Shelby County Community Theater. I just started this week, and as I proceed I will post the progress pics. They are fun to look at. And I'm way too tired to talk about anything else.


Saturday, June 6, 2009

Sale


Click on the image above and take advantage of this summer's sale of 20% off all of my children and nursery artwork, including paper prints and giclee canvas. I might even throw in an original hand painted piece or two while the sale lasts.

Friday, June 5, 2009

New Artwork

Suffering from yet another horrible headache, but here are a couple of new sets I have completed, just need to list. Enjoy.


Wednesday, June 3, 2009

School's Out...

It's just the first day of summer vacation here but seriously, Calgon don't just take me away, drown me.


Here is a new set I finished tonight. It's all digital, but still cute and colorful.

Tuesday, June 2, 2009

Add a border and they will come

I'm not big on putting standard borders on my artwork because I think that if people decide to mat the work then it sort of defeats the purpose. Nevertheless, borders sell better. Here are a couple of sets I've recently finished, only to go back and put a border around them.


These will both be available at TiddliwinkDesigns.com soon. Also, my praying boys are finished and will be listed soon as well.


Working on

A new Christianity series of artwork. I've been contemplating multiple ideas but wanted something original. This is the beginning of the series. I'll have my praying boy's ready soon in addition to something else I can't wait to share.


Her hair color is available in 4 different colors and she can be personalized with a name and a prayer, just a name, just a prayer or nothing at all. I'll have the paper print listed on Etsy first, then at TiddliwinkDesigns.com.

Monday, June 1, 2009

So easy a caveman can do it

My kiddos are nomads. Well my girls sort of are. They are back and forth between their dad's and my house. They also are invited to quite a bit of sleep overs these days. Generally, what I do with their sleep over stuff is just put it in their back packs, but this is inconvenient when you have to dump all of the school supplies out first, and I use old back packs to store the 10,000 pounds of papers they bring home at the end of the year. I've been looking out for cheap over night bags, but lets face it, when you have 4 kids nothing is cheap. So I picked up some canvas bags earlier this week, at $2.99 each, and started to decorate.

This takes absolutely no talent. Honest. All I did was trace a bunch of circles in pencil and paint them in with craft acrylics in different shades of blue. To make it a little more fancy I added the trim around the top. I sewed this on, but it could have just as easily been glued into place.

I also added these iron on rhinestones, which say "Sleep over bag". I seriously debated if I should have put anything on here, but Tatum is my more laid back child and wouldn't be totally devastated and embarrassed by those 3 words. Bailey, on the other hand, well she's 8 going on 15.


The little picture pockets on the front can be used for many more things other than pictures. A house key, a cell phone, money, and all of the other little stuff they won't want to go digging for later on. The total cost for this bag was under $10.00.

1 down, 3 to go!


Sunday, May 31, 2009

"I get to keep your change"

Recently, my son and I went to retrieve his fishing pole from his Papaw's house. While out that way we met my dad for lunch at my favorite fast food Italian restaurant. Since my dad had given me $25 in gift certificates for my most recent birthday it was an added incentive. I even offered to pick up the tab for my father's meal. The total was $12.78. I handed over 3 gift certificates in the amount of $15.00 ($5 a piece.) The girl behind the counter, with all 4 of her facial piercings, innocently declared, "I can't give you your change back, I have to keep it."

I laughed at the girl, informing her that she couldn't do that, that it was illegal. She shrugged her shoulders and declared ignorance. My non-confrontation father quickly whipped out $3.00 in cash and handed it over, squashing my hopes for a debate of legalities.

Mind you, this was not a gift card, nope. However, there sat on the top of the counter a solicitation for gift cards. I asked my dad, as we stood at the register, why he didn't just get a gift card so as not to have caused this situation to begin with. He said he tried, but that they didn't know how to work the machine. Of course! How else do you swindle people out of a couple of dollars at a time??

Food just doesn't taste so good when irritated.

When I got home I informed my attorney husband of what occurred. He quickly looked up the KRS statue regarding gift certificate laws ignored me. So I took it upon myself to look them up. Of course, after reading more than 4 pages of the gift certificate act, I found out that I'm right. But I was also intrigued that gift certificates can not expire before 365 days, and only if the expiration date is clearly declared on the front or the back of the gift card. This is KY statute, your state's may vary. Check out this link for a basic summary of your own state's law. This knowledge is good to know, since I've gotten gift certificates in the past that say they expire in as little as 45 days!

And just so you know, my son got his fishing pole and even caught his first fish at the Annual Fishing Derby in Lawrenceburg Kentucky!

Thursday, May 28, 2009

Working on

Listing this new series on eBay, Etsy and TiddliwinkDesigns.com


This would be super cute in a bath room or toy room. Of course, it would also work in an "Under the Sea" bedroom or nursery. I should have it listed on my website soon!


Wednesday, May 27, 2009

How it starts

Every product that was ever created had to begin somewhere. My grandfather had several patents. Selling just one of those patents provided enough money for my grandparent's to be the proud owners of a large house boat with enough sleeping room for their kids and grand-kids. My husband, an attorney/politician, has been working many hours for the last 6 months on his invention. The patent pending number has already been declared. Here is a video showing what it does. It's a tennis teaching device, still unnamed but an amazing tool in helping our children with their ball striking abilities. The idea is that the ball is dropped closer to their level making it easier for them to practice hitting, much like a "t" for t-ball players. Maybe we can one day have a house boat to call our own!


Tuesday, May 26, 2009

Diaper Cakes

Here are a couple of more diaper cakes I have made over the last few months. The yellow was for a boy/girl twin shower. Very simple, with just diapers, receiving blankets, ribbon and toile. I've found that fanning the diapers around is much easier for both myself and the recipient.


The blue cake was created with receiving blankets, diapers, ribbon, toile, some goodies in the middle and some gently used sleepers and outfits.

So just a couple of added suggestions when it comes to diaper cakes. Keep it simple and neat. Diaper cakes don't look very nice with tons of stuff clipped onto the outside. I know the idea is to show all that is included with the cake, but try making an "ingredient list" instead. Something that explains what the diaper cake is made of. Keep an open space inside of the top tier that you can toss all of the little things inside, such as pacifiers, bottles, ointments, etc. Just DON'T mess up your cake by plastering junk all over the outside.

Monday, May 25, 2009

Once upon a blog...

What you may not know about me is that I have been blogging since before the word blog was cool. I began my exhibitionist adventure back in 1999, when we simply said we had an online journal or diary. My motivation at the time was to allow my family and friends to follow me as I went through my twin pregnancy (my first 2 children.) I had several hundred followers at my original domain of KeshiasKeepsakes.com. Over the span of the next 6 calendar years I was pregnant, therefore the journaling (or blogging) continued. Eventually I slowed down, until I stopped altogether. Perhaps it was the lack of a baby to be, but more likely the lack of time. Here is a picture I had posted of my pregnant belly when I was 22 weeks pregnant with my twins. Notice the graininess of the image. That digital camera was a gift from my ex-husband. All 1 megapixel of it, which cost upward of $500 at the time. Amazing to think of how far technology has come.


I'm now the proud owner of nearly 200 journal pages, printed out and placed into a binder. I can't imaging placing a label on the outside with the word "blog" as the description.