Showing posts with label craft ideas. Show all posts

Thursday, July 30, 2009

A paint spot makeover

My little painting spot has moved several times over the years. It started at the kitchen table, moved to our very expensive dinning table, then was moved to the downstairs in various places. Eventually I landed in the dungeon. The unfinished area of our house, which is also the home of our water heater, furnace and electricity central. I did this in an effort to keep my clutter out of sight from my husband, who HATES clutter. But all artists know that painting in dark spaces is very inhibiting. Even after investing in 2 true light lamps I still had a difficult time. Within the last 6 months I moved my stuff behind our sofa in the family room, which is directly in between 2 french double doors with LOTS of natural lighting. I quickly discovered how much I LOVED painting here. I could see the kids, I could see the television, I could see my ART!

Except it was getting pretty cluttered and messy. Mostly because I was doing this all on an old poker table covered in cardboard. This week I worked on cleaning up the clutter and created a nook I can now retreat to and feel relaxed!

Here is the outcome:


My dad helped me to make this really awesome ribbon holder. I HATE dowels going through my ribbon because if I want to organize by color and I add new ribbon then I have to take ALL of the other ribbon spools off and start from scratch. This holder has a lip on the edge of each shelf to prevent my ribbon from rolling off. I spray painted it black, and then stapled black poster board to the back. Lovin' it, right?? Dad's are awesome.

I moved my peg board from the dungeon to below the ribbon holder. So much more efficient.

This set of canvases I made out of scrap paper I had on hand, mod podge and paint. I love it!

I bought the black desk and book shelf and lined the back side of the desk with fabric and paint so that the unfinished edges wouldn't show. The storage furniture in the back I got on clearance, and is actually closet organization furniture. The shelves actually slide out. I like that a lot.

Of course, most of my stuff is still in the dungeon but that's okay. It's stored away neatly in the area that has no light. But I will now have all of the light I need, and it looks good enough not to have to hide.


I do try my best to label everything. Although I mostly paint I have everything from foam crafts to embossing guns stored here.


This is where I keep most of my shipping supplies and canvases.

I used to put up images of my artwork on this back wall for inspiration, but I've been so busy that I stopped doing that a couple of years ago.

Monday, June 1, 2009

So easy a caveman can do it

My kiddos are nomads. Well my girls sort of are. They are back and forth between their dad's and my house. They also are invited to quite a bit of sleep overs these days. Generally, what I do with their sleep over stuff is just put it in their back packs, but this is inconvenient when you have to dump all of the school supplies out first, and I use old back packs to store the 10,000 pounds of papers they bring home at the end of the year. I've been looking out for cheap over night bags, but lets face it, when you have 4 kids nothing is cheap. So I picked up some canvas bags earlier this week, at $2.99 each, and started to decorate.

This takes absolutely no talent. Honest. All I did was trace a bunch of circles in pencil and paint them in with craft acrylics in different shades of blue. To make it a little more fancy I added the trim around the top. I sewed this on, but it could have just as easily been glued into place.

I also added these iron on rhinestones, which say "Sleep over bag". I seriously debated if I should have put anything on here, but Tatum is my more laid back child and wouldn't be totally devastated and embarrassed by those 3 words. Bailey, on the other hand, well she's 8 going on 15.


The little picture pockets on the front can be used for many more things other than pictures. A house key, a cell phone, money, and all of the other little stuff they won't want to go digging for later on. The total cost for this bag was under $10.00.

1 down, 3 to go!


Sunday, March 8, 2009

Saving the world from foam...

One craft idea I'm passionate about eliminating from parties is foam. Not foam in its entirety, but the foam kits that you find at your craft store that leads you to believe that the little people at your party will make a special craft that will last forever just because it's so darn cute. However, this is the first thing mom will toss simply because it's a step below the McDonald's happy meal toy even though her own child made it. Therefore, in my next few posts I will be presenting craft idea's for parties of all occasions.


The first is the Jammy Party Jammies.


Here is a list of the items you will need for this project:


  • Men's tank style t-shirts

  • Printable iron on transfers

  • Rick racks and other embellishments such as gems and buttons

  • Fabric paints

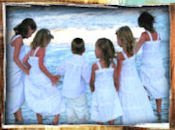
As soon as the girls arrived at the party I lined them up for a quick photo shoot. I quickly transferred the picture to be printed onto the iron on transfer paper.


After the girls had their pizza and cake we started decorating their jammies. I chose the tank style men's shirts because they are inexpensive, however they can hang a bit long under the arm pit area. In this case, I sewed the gaps before the party. But for those who don't sew, the tops can be pulled taut and tied with ribbon.

Each girl selected the area she wanted her party picture to be placed and then decorated around that particular area. Some spent close to an hour dedicating their creativity to making their PJ's perfect. Once they finished I shooed them off to play games with the ever great Aunt Kara while I ironed on the transfer photo.


Each girl went home with jammies to remember. And my own girls still occasionally wear theirs, even after 2 1/2 years.