Showing posts with label Cool Stuff. Show all posts

Thursday, July 30, 2009

A paint spot makeover

My little painting spot has moved several times over the years. It started at the kitchen table, moved to our very expensive dinning table, then was moved to the downstairs in various places. Eventually I landed in the dungeon. The unfinished area of our house, which is also the home of our water heater, furnace and electricity central. I did this in an effort to keep my clutter out of sight from my husband, who HATES clutter. But all artists know that painting in dark spaces is very inhibiting. Even after investing in 2 true light lamps I still had a difficult time. Within the last 6 months I moved my stuff behind our sofa in the family room, which is directly in between 2 french double doors with LOTS of natural lighting. I quickly discovered how much I LOVED painting here. I could see the kids, I could see the television, I could see my ART!

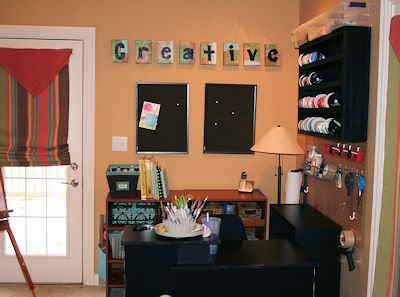
Except it was getting pretty cluttered and messy. Mostly because I was doing this all on an old poker table covered in cardboard. This week I worked on cleaning up the clutter and created a nook I can now retreat to and feel relaxed!

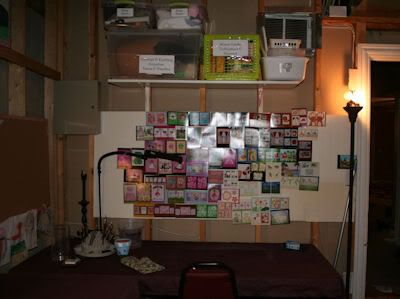
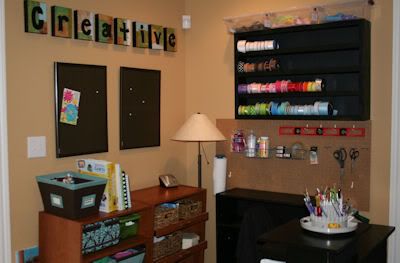
Here is the outcome:


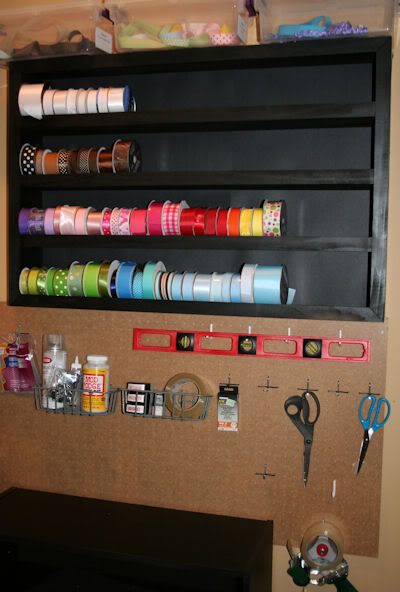
My dad helped me to make this really awesome ribbon holder. I HATE dowels going through my ribbon because if I want to organize by color and I add new ribbon then I have to take ALL of the other ribbon spools off and start from scratch. This holder has a lip on the edge of each shelf to prevent my ribbon from rolling off. I spray painted it black, and then stapled black poster board to the back. Lovin' it, right?? Dad's are awesome.

I moved my peg board from the dungeon to below the ribbon holder. So much more efficient.

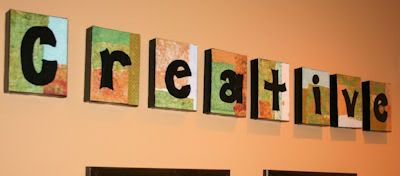
This set of canvases I made out of scrap paper I had on hand, mod podge and paint. I love it!

I bought the black desk and book shelf and lined the back side of the desk with fabric and paint so that the unfinished edges wouldn't show. The storage furniture in the back I got on clearance, and is actually closet organization furniture. The shelves actually slide out. I like that a lot.

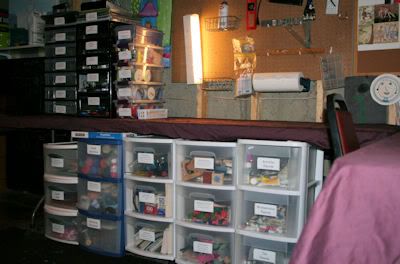
Of course, most of my stuff is still in the dungeon but that's okay. It's stored away neatly in the area that has no light. But I will now have all of the light I need, and it looks good enough not to have to hide.


I do try my best to label everything. Although I mostly paint I have everything from foam crafts to embossing guns stored here.


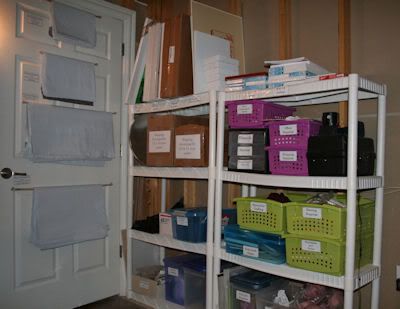
This is where I keep most of my shipping supplies and canvases.

I used to put up images of my artwork on this back wall for inspiration, but I've been so busy that I stopped doing that a couple of years ago.

Monday, June 1, 2009

So easy a caveman can do it

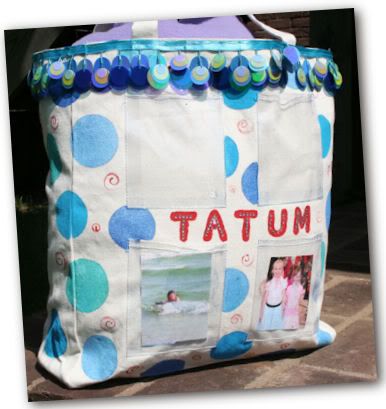
My kiddos are nomads. Well my girls sort of are. They are back and forth between their dad's and my house. They also are invited to quite a bit of sleep overs these days. Generally, what I do with their sleep over stuff is just put it in their back packs, but this is inconvenient when you have to dump all of the school supplies out first, and I use old back packs to store the 10,000 pounds of papers they bring home at the end of the year. I've been looking out for cheap over night bags, but lets face it, when you have 4 kids nothing is cheap. So I picked up some canvas bags earlier this week, at $2.99 each, and started to decorate.

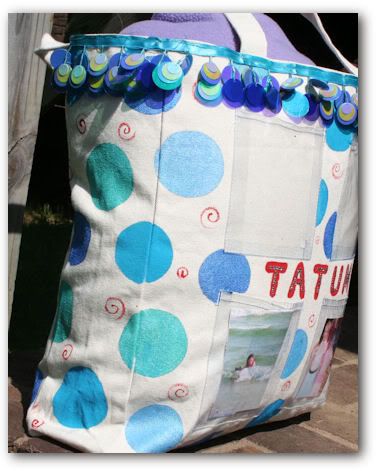
This takes absolutely no talent. Honest. All I did was trace a bunch of circles in pencil and paint them in with craft acrylics in different shades of blue. To make it a little more fancy I added the trim around the top. I sewed this on, but it could have just as easily been glued into place.

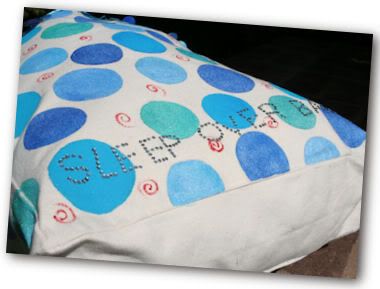
I also added these iron on rhinestones, which say "Sleep over bag". I seriously debated if I should have put anything on here, but Tatum is my more laid back child and wouldn't be totally devastated and embarrassed by those 3 words. Bailey, on the other hand, well she's 8 going on 15.


The little picture pockets on the front can be used for many more things other than pictures. A house key, a cell phone, money, and all of the other little stuff they won't want to go digging for later on. The total cost for this bag was under $10.00.

1 down, 3 to go!


Wednesday, May 27, 2009

How it starts

Every product that was ever created had to begin somewhere. My grandfather had several patents. Selling just one of those patents provided enough money for my grandparent's to be the proud owners of a large house boat with enough sleeping room for their kids and grand-kids. My husband, an attorney/politician, has been working many hours for the last 6 months on his invention. The patent pending number has already been declared. Here is a video showing what it does. It's a tennis teaching device, still unnamed but an amazing tool in helping our children with their ball striking abilities. The idea is that the ball is dropped closer to their level making it easier for them to practice hitting, much like a "t" for t-ball players. Maybe we can one day have a house boat to call our own!


Sunday, September 14, 2008

How to Make a Diaper Cake

With so many expecting in my friends and family network I've been doing a lot of research on what's new in the baby gift giving industry. A few months ago I discovered the diaper cake and immediately was fascinated. I love giving diapers for showers. I do this because it's the absolute most practical gift. However, you don't get a lot of "ooohhh"s and "ahhhhh"s with a box of diapers no matter how nicely you wrap they gift.

I have a baby shower this afternoon and was eager to make my first diaper cake. Now I want to share with you just how to do it.

Diaper cakes can be made at so many different levels. I did a bit of research first and sort of put some idea's together before doing my baby shopping. Here is what I bought:

*80 size 3 Target brand diapers (she's a first time mom and may not be happy about generic but I'll give her a couple of months before she changes her mind.) They were 50% cheaper than pampers).

*15 new born baby diapers
*A baby bottle
*Baby Wash
*Baby Lotion
*4 Receiving blankets to go with her decor (I checked her registry for this info)
*A set of 2 Bottle Cleaners
*Comfort Blanket for the topper

I also had to buy the following to put the cake together:
*16 inch cake circle for the bottom of the diaper cake
*Wooden dowel to hold the cake together
*Assorted rubber bands for the diapers
*Various ribbons
*Pink Toile

Now here is a step by step on how I put this together. Let me first say that this takes A LOT of patience and practice for your first time. I think I spent about 2-3 hours messing with it, putting it together and taking it apart to start all over again.
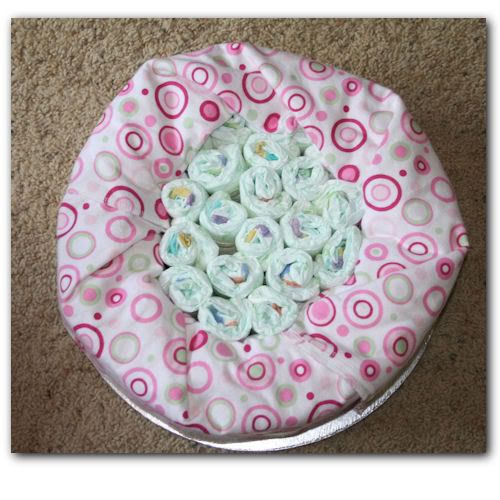
For the bottom layer I wrapped 40 size 3 baby diapers with rubber bands to hold them into place. I needed 2 receiving blankets to completely cover the diapers. This is probably the most frustrating part because you want the blankets to be taut, not sloppy and loose.
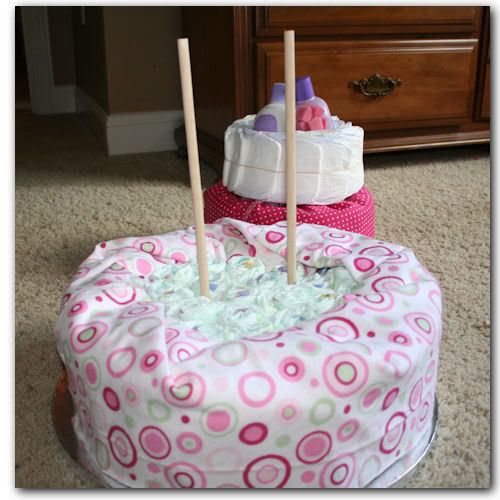
I used a branch cutter to cut my dowel into the appropriate size and inserted them through the cake circle. This is important, because without it your cake will slide all over the place and will be a mess when you deliver it to your shower.
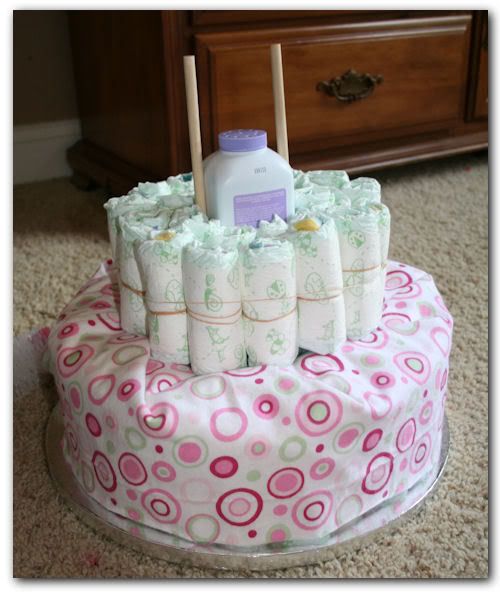
I used 21 diapers for the center layer, in addition I added a bottle of baby powder to the center. These extras aren't necessary for a diaper cake, just fun for the mom to be. Much like finding a wedding cake has a raspberry filling. Yum.
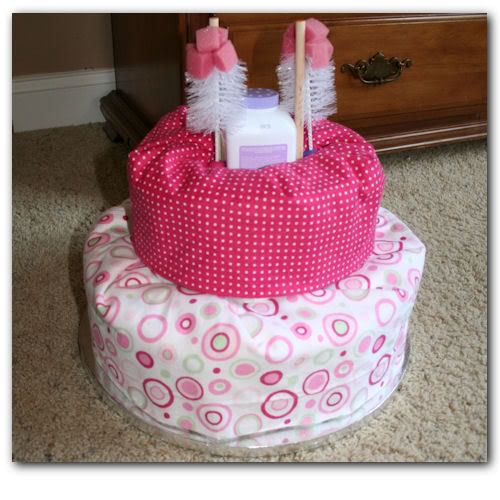
I then wrapped my second layer with another receiving blanket. I had to play with this a few times because the blanket wasn't quite long enough. So I had to fold it in a triangle to get it to work properly. Then I inserted the 2 baby bottle washers along the dowels.
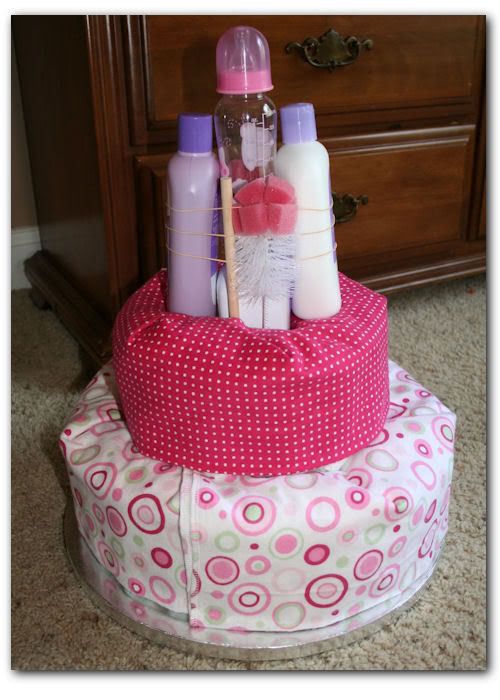

Next, I placed the baby wash and the baby lotion on top and wrapped several rubber bands around the collection of baby items to keep them in place.
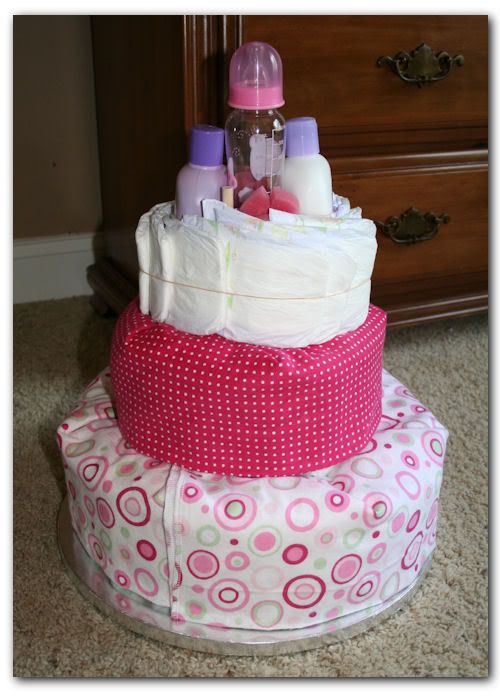
Then I took my new born diapers and fanned them out around my baby supplies. Another rubber band was used to hold everything in place.
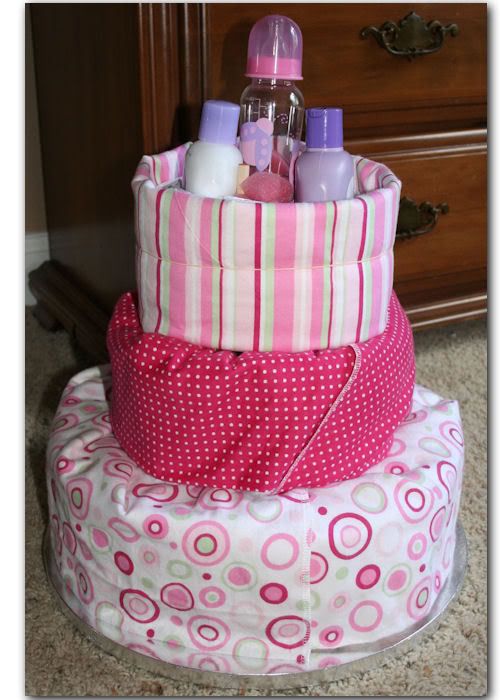
My final receiving blanket was used to cover the diapers on the top. and secured with another rubber band.
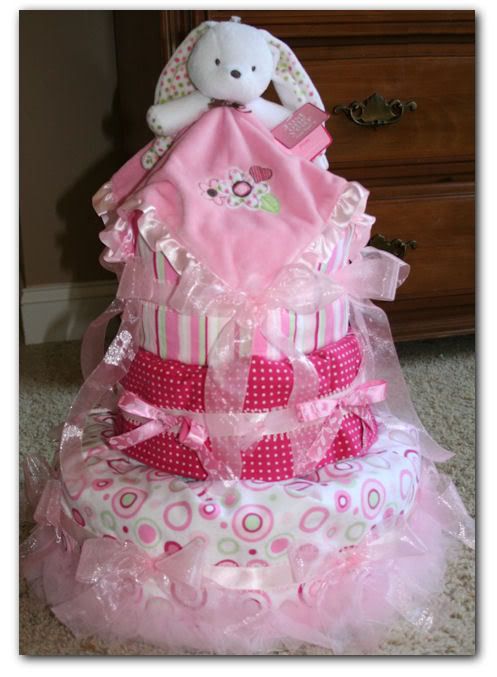
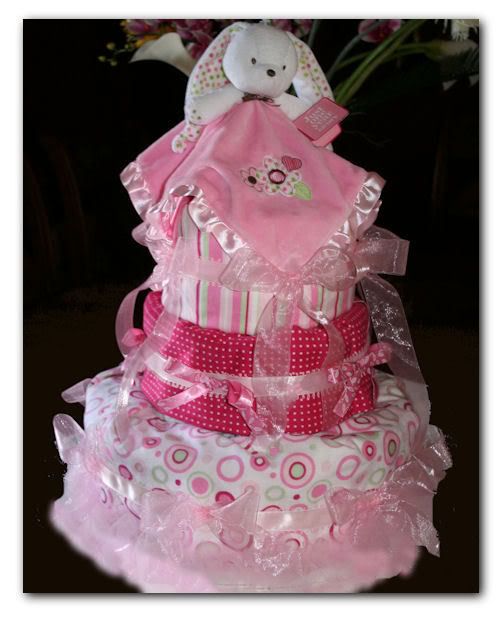
Once I was finished with the diaper cake I began to decorate it. This is the most fun. My topper is secured in place with the ribbon on the first tier. I used pink toile and a hot glue gun to cover my cake circle. Each tier has been wrapped with a ribbon and glued into place (onto the ribbon, NOT the blankets). Then I made about a dozen bows and glued them all the way around the cake. Voila. Tell me this isn't cute.
Thursday, September 11, 2008

Baby Hideout...

My sister and sister in law are both expecting babies soon. I am so excited to hold and care for infants that won't keep me up all night. I'm even more excited about shopping for all of the little baby stuff that is completely unpractical but absolutely adorable. I'm also amazed at how deprived I was when my children were infants. Have I mentioned that my youngest is not even 5 yet? Outstanding things have happened in the baby industry and I want to pout just a bit because it isn't fair.

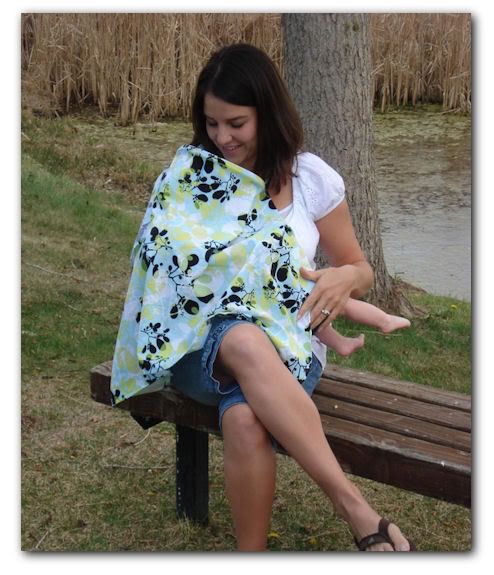
For instance, the Baby Hideout is an amazing tool for nursing mothers. My other sister in law used this for her youngest daughter and I loved how it kept her discrete. Mind you I've never really minded nursing in public but I always did my best to cover up. I would take dinner napkins in restaurants and do my best to wrap it across my chest. I was determined not to be like some of the mother's I've seen in public (like the zoo or at a shopping mall) who just whip out their tata's and let their child go to town. Even I, a non people watcher, can't help but to gawk at a boobie in the middle of public.

My sister's sister in law (I know, a lot of sister in laws) actually makes these awesome things. They're like aprons in a way but large enough to give you and your baby privacy while feeding, or even sleeping. And they come in amazing patterns and fabrics. Check them out at Baby Hideout.