Showing posts with label ideas. Show all posts

Thursday, July 30, 2009

A paint spot makeover

My little painting spot has moved several times over the years. It started at the kitchen table, moved to our very expensive dinning table, then was moved to the downstairs in various places. Eventually I landed in the dungeon. The unfinished area of our house, which is also the home of our water heater, furnace and electricity central. I did this in an effort to keep my clutter out of sight from my husband, who HATES clutter. But all artists know that painting in dark spaces is very inhibiting. Even after investing in 2 true light lamps I still had a difficult time. Within the last 6 months I moved my stuff behind our sofa in the family room, which is directly in between 2 french double doors with LOTS of natural lighting. I quickly discovered how much I LOVED painting here. I could see the kids, I could see the television, I could see my ART!

Except it was getting pretty cluttered and messy. Mostly because I was doing this all on an old poker table covered in cardboard. This week I worked on cleaning up the clutter and created a nook I can now retreat to and feel relaxed!

Here is the outcome:


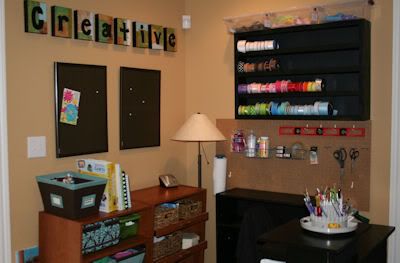
My dad helped me to make this really awesome ribbon holder. I HATE dowels going through my ribbon because if I want to organize by color and I add new ribbon then I have to take ALL of the other ribbon spools off and start from scratch. This holder has a lip on the edge of each shelf to prevent my ribbon from rolling off. I spray painted it black, and then stapled black poster board to the back. Lovin' it, right?? Dad's are awesome.

I moved my peg board from the dungeon to below the ribbon holder. So much more efficient.

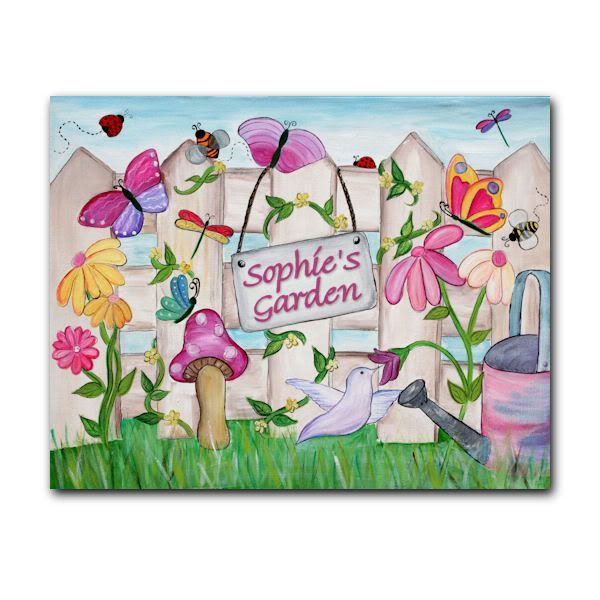
This set of canvases I made out of scrap paper I had on hand, mod podge and paint. I love it!

I bought the black desk and book shelf and lined the back side of the desk with fabric and paint so that the unfinished edges wouldn't show. The storage furniture in the back I got on clearance, and is actually closet organization furniture. The shelves actually slide out. I like that a lot.

Of course, most of my stuff is still in the dungeon but that's okay. It's stored away neatly in the area that has no light. But I will now have all of the light I need, and it looks good enough not to have to hide.


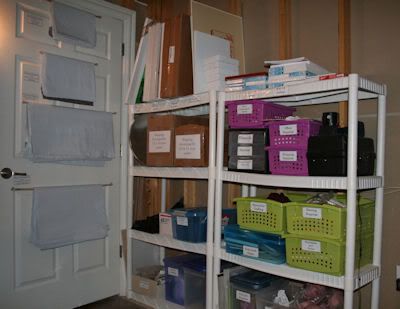
I do try my best to label everything. Although I mostly paint I have everything from foam crafts to embossing guns stored here.
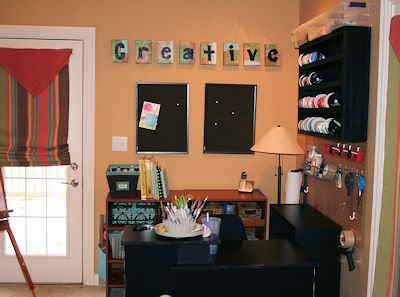


This is where I keep most of my shipping supplies and canvases.

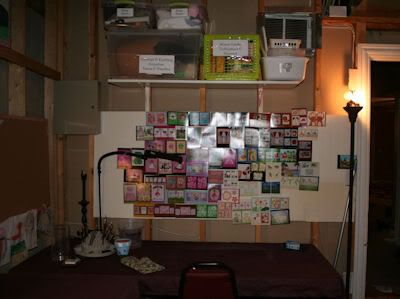
I used to put up images of my artwork on this back wall for inspiration, but I've been so busy that I stopped doing that a couple of years ago.

Tuesday, July 28, 2009

Old and new art...

I found this picture of the kid's toy room when I first painted a mural in there. My sister did the cute little girls on the swings and the baby crawling in the grass. That was painted over for an underwater theme and then painted over again, but without a mural.


I've made a couple or three new designs. They will be listed at TiddliwinkDesigns.com soon. In the mean time they are on etsy and ebay. I've been swamped to say the least. In addition I'm working on my working area. I can't wait to post pictures of that stuff. Exciting.


Here are the new designs:


Friday, July 24, 2009

And when you plan a wedding...

don't forget to make your entrance unforgetable!


I really loved this on many levels. But could you imagine being asked to be a bridesmaid and then told, "oh, yea, I am going to need you to dance your way down the aisle"?

But I still shed a tiny tear when the bride emerged. Not only did she get the crowd to stand but they applauded as well! What fun years this couple will likely have ahead of them.

Wednesday, August 13, 2008

Birthday Party Solutions

Gone are the days of expensive birthday party celebrations. Maybe because of the economy, or maybe because of the discovery of the ridiculousness behind spending several hundred dollars just to get the chance to sing Happy Birthday to my child.

A bit more than 8 years ago my ex husband and I extravagantly celebrated with our entire friends and family network that our twin daughters were turning one. This was probably more of a celebration for ourselves, but nevertheless we spent a lot of money. Not only that but I spent many hours cutting and crafting and scrapping 50 hand made “Survivor” themed invitations. And for those friends who helped us through it all, from sitting with us in my hospital bed rest room for Survivor Island Thursday’s to those who took our infant twins for an overnighter, I made certificates of appreciation.

Even after that first celebration of birth’s the birthday party madness continued. Slowly, 8 years and a couple of kids later, I’m catching on. We’ve done it all. Chuck E Cheese, Bowling, Rent A Jumper, Bounce House Party Centers, Inflatable Water Slides, Slumber Parties, etc. The most expensive cost in the upper $400 range. How does one justify this? Easy. “They are only (insert age here) once.”

So I challenged myself recently. The twins were turning 8. What was the least amount I could spend on their birthday party? I’ll tell you the answer in a moment. In the mean time here are a few of my money savvy solutions:

*Party Sharing. Yeah I know, twins share parties anyway. But this year I threw in my niece (age 9) as well. The family was going to have to attend both parties anyway, so we just included her and shared some of the expenses.

*Home Made Cakes: My kids were a bit ticked about this one at first. They quietly pouted about wanting a Hannah Montana/High School Musical/ Camp Rock/Ashley Tisdell birthday cake, but I promised them I would make the icing their favorite colors. I’ll share some cake making ideas from my very amateur self in the future.


*Dollar Store Deals: In all we had about 12 children attend our party. In the past, Chuck E Cheese charged me $5.00 a gift bag for each of our guests. This year I hit the dollar store and bought 9 light up tiara/jewelry sets and 3 target practice toys. At a dollar each I saved a ton. While there I picked up the party supplies. Yea, granted they don’t have matching sets of everything, but be imaginative. Mix and matched birthday items are more festive than a single design anyhow.

*Be Crafty!: My 4 year old son was adamant about his twin sisters having a pin-ya-tee-a. So I caved and we began our search for a fun and affordable piñata. To my shock those things are costly. A Hannah Montana/High School Musical/ Camp Rock/Ashley Tisdell piñata costs about $25-$30 at Wal-Mart. Gasp. That was not going to happen simply because that was 100% more than what I had spent on the whole party. So we improvised. I saw a cool Spiderman piñata on clearance for $7.00. I was stoked. Yes, my girls were again devastated and sure to be traumatized if they had friends over only to see a Spiderman piñata, but they didn’t know what I had in store. With a little bit of card stock, some left over tissue paper and some cute pictures of the birthday trio I transformed our piñata into something spectacular.

*Use the family talent: My sister happens to teach 2nd grade. Her husband owns a talent center in which he also has coached my daughters in gymnastics. Therefore these two are amazing with children. Their water game creations were enough to keep the children (and the adults) in laughing mode for 2 solid hours.

The grand total of my party? $60.00

  • Dollar Store Party Favors: $13.00
  • Dollar Store Party Supplies: $8.00
  • Home made birthday cakes: $12.00
  • My part of the food and drinks:$20.00
  • One revamped “pin-ya-tee-a”: $7.00

And in the end my kids were excited about their party and even gave me a shout out for having made their birthday cakes and the pin-ya-tee-a! Birthday party success.